


Wheelie Safe® x 10 Sets for £595 (Excluding VAT)
Description
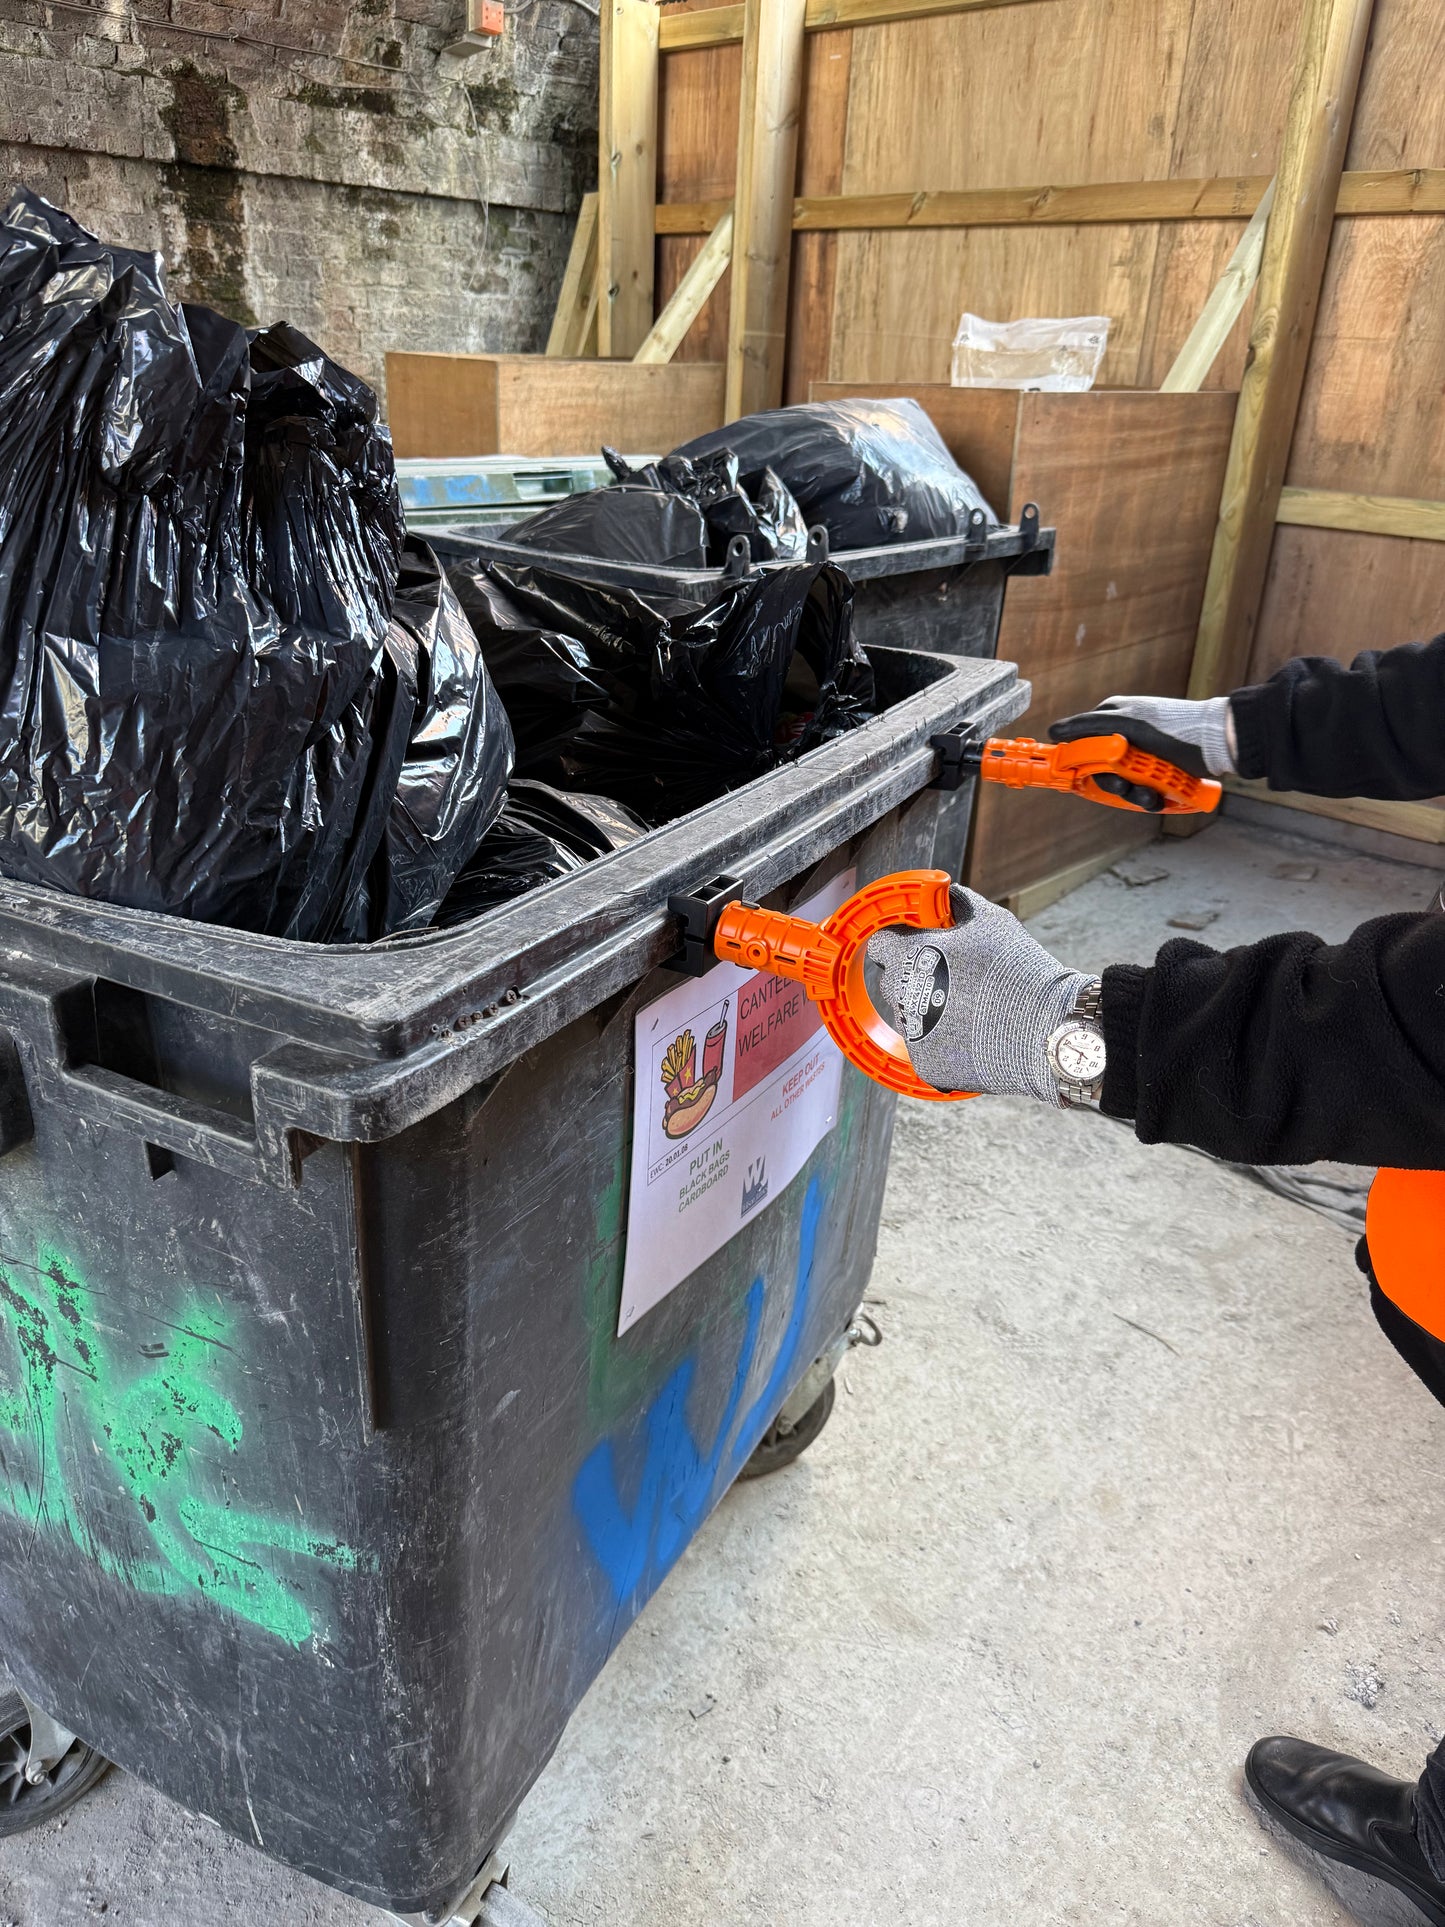
We’ve all experienced the delightful job of re-positioning the wheelie bins after they have been emptied. The most common place is backed up to a wall, pulling and pushing from the front lip. As your bin gets emptied out its picked up by some metal claws and tipped in the back of the lorry, the contents passing over the front lip. This action can cause light damage resulting in sharp nicks and burrs, enough to cause mild cuts and abrasions potentially through disposable latex gloves. Even with the best of waste management procedures in place it’s pretty much guaranteed that at some stage the dreaded bin juice will appear. The list of nasties that can be found include but are not limited to the following: Weil’s disease, cholera, dysentery, typhoid, onchocerciasis, sandfly fever, conjunctivitis, campylobacteriosis, esthetician, coli, diarrhoea, and hepatitis A.
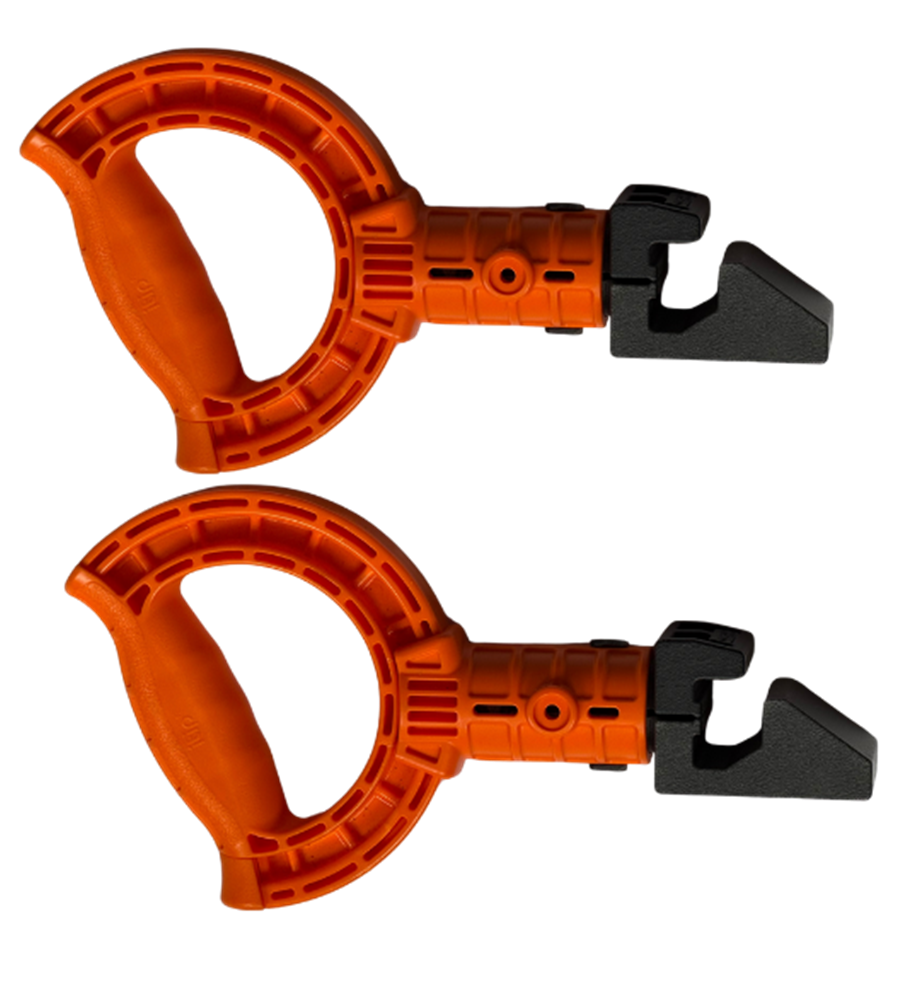
Following persistent requests to work on a safety handle for this task from an NHS Trust we are delighted to offer to market our patented design.
Please note that the colour of this product will be chosen randomly from available options. We can't guarantee a specific colour,
Colours: Orange, Yellow, Green, Blue, Navy, Black, Red, Pink, Lilac, Purple,
Delivery Information
Share some content to your customers about your products.
Returns Policy
Share some content to your customers about your products.

Happy Customers
Product Reviews
Mrs Briant
Office Manager, Wolverhampton
“Not being particularly tall I have never been able to operate a sack trolley. My work requires us to move stuff around so I'm often loading them up but have to ask another member of the team to actually move it. Not anymore! It made me feel included and was a great boost for myself esteem as well as mental health.”
Steven R. Page
Health& Safety Supervisor Chichester Contract Services
"The set we have were fitted to a sack truck we had for our bulky household crew. Feedback appears to have been good and I believe our grounds department are keen to try them out on their wheelbarrows."
Myra
Equestrian Stable Manager
Thanks to everyone at iTip for helping with my wheelbarrow solution. Arthiritic hands and wrists are not joke with horses and muddy fields."
Get started with ease
Installation
Mark from Veg Grower Podcast shows you how easy it is to fit iTip® Handles.
Download Installation InstructionsFirstly remove the existing handles.
Depending on the width of your wheelbarrow arms, slide the provided spacers on before the handles so they fit well.
Then take the iTip® Handles and slide over the wheelbarrow arm. Finally using an electronic screwdriver tighten the self-drilling screws...but not too much!
Repeat the process with the other handle and you are ready for action. Its good practice to check the grip of the new handles periodically.
Easy & Minimal
Maintenance
ITip require very little maintenance. Occasionally check the fixing screws are still tight. Apart from that from time to time and depending on where you’ve been using your equipment you may find a quick clean and application of either silicone spray or WD40 (or similar) to the faces of the D handle and the connector that slide past each other. This will ensure nice smooth operation for many years.
Download Maintenance Instructions